 Look what I’ve got. The first Kowal Portable Typewriter and Adding Machine.
 I mentioned that I wanted to modify my computer to have some of the stylings of a portable typewriter. After a great deal of thought I decided to go with sticker applications on the keys due to the wee attachment points on the existing key caps. To create the sticker, I started by taking a photo of my keyboard as close to straight on as I could. If I do this again, I will scan it instead.
 Next I grabbed a stock photo of a typewriter key. Now, since the computer keyboard has a lot of keys that a manual typewriter doesn’t, I knew that I would have to create keys from scratch. So, I erased the letter on this one and used it as the template for all the keys. For the font I chose P22’s Parish Roman, which is a gorgeous spin on the standard Roman fonts. You’ll see how lush it is in the next photos.
|
|
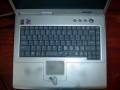
I laid out the keyboard directly over the photo I took to control for spacing. If I do this again, I will squish the keys closer together so that I have more space around the keyboard area for making adjustments to fit. I thought I allowed enough, but I didn’t. |

 I’m about halfway through the process in this photo. I used a piece of paper to make a template to cut the keyboard area of the sticker to the right size. As you can see, I wound up with silver space all the way around, but in my original, I was going to run the sticker right up to the edge of the keyboard. I think the image was enlarged slightly when they placed it on the sticker. The process of modifying the keys is pretty simple. Here– I’ll show you.
 |
Pop the key off the keyboard with a butter knife. |
 |
Cut out the corresponding key with your exacto knife. I was paranoid about losing a piece so I only cut out one key at a time. |
 Carefully center the sticker on the key. Carefully center the sticker on the key. |
|
 |
This is the squiggly part. I had to bevel the edges of the stickers as I was trimming them, or the edges were noticeable and distracting under my fingers. |
 |
Next, I colored the edges with a permanent marker. I initially did that before adding the sticker, but the edges of the sticker showed up as white. Over the two week since I did this, the ink has crept under the stickers giving a slight patina to my new keys. It doesn’t look bad in this context, but it’s not what I planned. I’m also discovering that in a couple of places, the ink is wearing off–not surprising, but faster than I expected. Next time, I think I’ll try to seal the edges as well as experiment with black enamel paint.Edited to add: I now use black nail polish. It is smooth, glossy and chip-resistant. The black marker wound up rubbing off. |
 |
Here’s the finished key ready to be installed. |
And here it is in all its glory.

Well, not quite all its glory. I still have to do the space bar, but I need to go to an art store for that. I’m debating about doing the space around the screen itself, which would be pretty, but just seems like a lot of wasted sticker, unless I can come up with something clever to do with the middle section. Hm, I guess I could do a style thing to the power supply… Nah. That would just be silly.
Edited to add: In response to comments.
- I used schtickers.com to create the sticker. These are repostionable tough stickers designed to protect the exterior of a laptop and have prooved pretty durable on the exterior, which I did about a month ago. I travel a lot and so no signs of wear, so I went for the interior. The stickers have a beefy vinyl coating so I think they’ll hold up to wear.
- I don’t believe that I’ve done anything which will impact the warranty. Although it’s a moot point, since the laptop is well past warranty date.
- And for the curious–the plan for the space bar is to use a very thin wood veneer to make an “ebony” space bar. It comes in paper thin sheets at the art store. I expect this to be the spot that shows the most wear, but that’s the way it is on actual vintage typewriters too.
- Edited to add: I finished the space bar. Pictures and process are detailed here.
- The design is based on a blending of an early Royal, a Remington and a Ox-blood red Smith-Corona.
- The background is actually a screen saver from 3planesoft. I wound up deleting it after trying the demo version, because it goes through this loading thing that was bulky. It is pretty though.
Further edited to add: The fine folks at schtickers.com have said that they would like to offer readers of my blog a 10% discount. Just enter the discount code KOWAL during the check out process. You might also want to use their old interface, as the new one does some resizing that might frustrate you.
Even further edited to add: I made a Deco version for my new computer.
Oh, Mary. That is about the most gorgeous thing I’ve ever seen. You have some seriously mad crafting skillz.
Damn, you’re amazing.
::swoon::
Unbelievable!
Mary, that’s beautiful! I hope it holds up over time!
Pingback: Boing Boing
That is about the coolest thing I’ve seen in a long time. When can you do mine? 😉
That’s sooo cool & very creative. My hat’s off to you.
how’d you do the printing (sticker paper, printer, etc) It looks pretty luxe. very nice
You’ve been BoingBoing’d – nice work, I expect this will hit the steampunk sites shortly, too.
Is there a howto for the nice enamel-like work on the keyboard surround? More stickerwork?
Beautiful, Mary! I remember you speculating about this a few months ago? And there you are on boingboing. Hats off to your creativity! 🙂
Great idea.
Great look.
That is simply stunning! I am terribly impressed – would you permit me to post about that on Brass Goggles?
Pingback: Typewriter Laptop | GeekAlerts
Hmm! I have access to a vinyl printer and a cutting plotter so I’m highly tempted to make my own set of key caps to see how it goes. I’ll try it with a print onto black vinyl, then laminate it and run it through a vinyl cutter to make individual key stickers
Pingback: Gizmodo
That is just stunning. I cam here via BoingBoing and your laptop is the most beautiful steampunk mod I’ve ever seen!
Goodness. I’m glad you like this, because I’m totally in love with it.
In answer to the questions about the stickers (which I’ll add to the main body of the post) I used schtickers.com, which makes laptop stickers that are designed to protect the outside of the laptop and seem to be pretty rugged.
This is gorgeous!
You should try the commercial sharpie markers that are resistant to chemicals. They are far more permanent that a normal permanent marker. They look like normal sharpies, but they have a warning on the side of them in red about how permanent they are and that they are resistant to chemicals.
MRK, you’ve set the web afire with this!!!
I want one now. I’d try to make it look like the laptops in “Brazil, though. Yours is so nice. Wow. Shiny.
I love the keyboard – but I really love the wallpaper / screensaver you’re using. Where can I find that?
That’s beautiful! Very creative and inspiring.
Pingback: Bernard AD » Blog Archives » Lady Steampunk: Mod your Laptop into a Portable Typewriter and Adding Machine
That looks amazing. Nice work. I felt a little bad this morning, though, with the boing boing effect. I wanted to see your site but I wasn’t able.
Pingback: » Vanhanaikaset kirjoituskoneen näppäinkuvat läppärissä - Hilavitkutin.com - uutisia härveleistä ja hilavitkuttimista » Arkistot
That is awesome! I am so impressed. I mentioned it on my blog.
Pingback: Joy Lanzendorfer » Awesome
Mary, all I can say is “You GO Girl!”
You bring new meaning to the word “KEWL” !
I wanna go out and get a laptop JUST so I can copy you!
(And really, where did you get that kickin’ wallpaper?)
Take care, you are now beloved by the ‘net.
😎
Have you installed typewriter sound effects for when you hit the keys? Here’s a freeware program that allows you to do that: Tiper.
gorgeous!
Pingback: Brass Goggles » Blog Archive » The Kowal Portable Typewriter and Adding Machine
Pingback: Personaliza tu portátil por fuera at Pisito en Madrid
Jeff: That’s a great idea. I’ll look into those.
Chang: If I see you at Readercon, you may fondle my laptop.
Brock and Steverino: I’m using the 3Planesoft Mechanical Clockwork screensaver.
flightless, Joy, elissa and Steverino: Thank you!
strugglingwriter: I know what you mean. I wanted to do an update and couldn’t even login to the dashboard. It seems calmer today.
Eric James Stone: I’ll give Tiper a try.
Pingback: ADBDAT » Blog Archive » Laptop typewriter mod
Pingback: Portable Typewriter Laptop Mod - Awesome! « Unleash your inner geek
Pingback: The Melville Salon » Blog Archive » Beautiful Typewriter
Wow, oh wow, that is so retrobeautimous!
I’m tempted to send you a laptop to retrofit-and pay anything you want to charge!
So fun and cool, Mary.
And the screensaver too. What screensaver is this “clock”?
Thanks
That thing’s even more amazing in person. One really needs to see it close up to truly appreciate it. Thanks for letting me view it.
Did I really fondle it? I think not.
Pingback: Nostalgia is no longer what it used to be, baby « sans serif
Dorsie: Let me test drive this longer to see how it holds up before you get too excited. I did have someone come up to me today at the con for a consultation on his laptop.
Bihar: You can get the screensaver at 3planesoft.com
Chang: If you hadn’t been drooling…
Pingback: Bright Meadow » Sunday Roast: here’s to unhappy endings
This is brilliant! I wish I can do the same
Pingback: ADBDAT » Laptop typewriter mod
Hi I really like your Modded Laptop.I was on a laptop buying spree this week and I saw your laptop on engadget. My dad said I could only buy about 10 laptops this week but I with some begging I got him to spend about 38.5k on that laptop you have there (or a laptop you modified like a typewriter) Email me.
-MITCH
What a wonderful idea. Gives a lot more personality to the computing experience. Tempted to do the same to my powerbook.
dementia, Mitchell, and Matthew: I’m glad you like it. Wait until it’s actually finished!
Pingback: Finger Food (3) « 88 Days
Pingback: Tech Digest
Yay, you’re back up. It was lovely to meet you and see your delightful machine at ReaderCon.
Cheers,
Geoffrey
Pingback: General Discussion discussion - Page 49 - Volconvo Debate Forums
Pingback: Shiny Shiny
oh my gosh, happened upon this and it’s amazing!!!
Pingback: Retro Chic · Craft Gossip :: Craft Blog Network
Pingback: Miscellany of a Cheshire Cat » Tuesday Open Tab Round-up!
Pingback: MAKE: Blog
Pingback: Gizmodo Japan(ギズモード・ジャパン)
Pingback: Graphic Arts Monthly Blogs » Blog Archive » Schtickers turn laptops to typewriters
That’s amazingly beautiful. Do you take orders? *g*
Pingback: Typewriter keyboard | urbanpromoter[dot]com - streetwear - sneakers - gadgets - design - shops - music - film - videos
WalMart has a great collection of plastic stickers/tags that look like old keyboard keys. Usually in the crafts section.
Geoffrey: It was so nice to meet you at Readercon too. Hope all is well with you.
Amy: Thank you!
Jonquil: Actually… I will (hopefully) be starting to take orders in August.
Abizar: You know, I looked everywhere for those, because I remembered seeing them. I finally gave up, in part because I realized that a computer keyboard has more and different keys than a typewriter.
nice background dare …. ware did u get it?
on the laptop … dat is …
can u give me at least a title for the laptop background?
Pingback: Serial Mapper
Ivan: I answered that question multiple times in the comments. I’ve also gone back and added it to the original post. Finally, please learn to spell.
sorry … didn’t notice … and by the way .. my words were in their short forms … if u didn’t know …
I do recognize the text messaging form, however, that does not mean they are correctly spelled. “U” is a letter. “You” is a word.
I’m a writer and like antiquities. I do not ask for much.
in that case i’m sorry …
Pingback: Furballs
The clock is pretty, but it drives me crazy because it has a second hand that acts like it is out of a different clock – one with a balance wheel instead of a pendulum. Also, there are some axles that look like they are running right through a gear. The escapement is well done though. Just turn off the sound so you don’t notice the two different rates of ticking.
Ivan: Thank you.
-d-: You can turn the sound off on the control panel for it.
Pingback: Polka Dot Creations » Blog Archive » Geekitivity
I saw your wonderful laptop on Brass Goggles, the Steampunk site. Wish I could buy one!
boocat: Give me another month to get some bugs worked out and I might be offering to do this mod for people.
Pingback: Old Fashion Laptop by LAPTOPGRAM
Wow! You should sell this as a kit! I’d buy it.
Thank you! I’m actually hoping to do that, but need to work out a few things first.
Pingback: Steve Krause’s Unofficial Blog » Blog Archive » Super-duper cool iBook Mod
You’ve had a re-linking on MAKE blog again, under the heading Typewriter Art. Yours is the last “related” picture and link, and it still looks as great as ever!
Gah! I have got to post the finished images. I’ve done the spacebar since then.
Hello Mary. I keep checking back on this page ever couple weeks since finding it through boingboing. If you do decide to sell this as a kit or service please give me a yell.
Regards.
hello,
i followed a link from a link and found your creation – it’s beautiful and inspiring and, most delightfully, achievable.
thankyou for sharing,
geof
Nick: Soon. I’m hoping by the end of the month.
Geof: Thank you for following the trail of breadcrumbs back here.
that has got to be one of the coolest things ever. i adore old typewriters and found it to be a wonderful idea!
Pingback: Una modifica al laptop e assomiglia a una macchina per scrivere | Ilgenio.com
Pingback: Haz un teclado retro para tu portátil « No puedo creer que lo hayan inventado…
Pingback: Blog InfoWester » » Um notebook, por assim dizer, clássico!
Mary!
What a surprise! This is Elaine in Portland, Matt’s wife. I was just doing some crafty surfing and came upon this. You are indeed a crafty goddess. I can’t wait to tell Matt. How are you and Rob? Are sound and wine still part of your life? Matt was interviewed on a local podcast that aired last night. We went to a listening party on NE Williams. Every time I see sound-challenged visuals or beautiful puppetry, I think of you guys.
I hope you are both well!
Beautiful Artwork! I would like to make the paper keys to decorate scrapbooks with…in the process of that, did you just take a pic. of an actual old key and then print it onto cardstock?
I downloaded a picture from istockphoto.com and used that. Then printed them on special stickers. I’ve since done another project where I printed them onto regular sticker paper. I think you could do it on anything, really.
nice post
nice post
nice post